


MACROFOTOGRAFIA ONLINE
MACRO COM CÂMERAS REFLEX
MACRO WITH DSLR CAMERAS
A Macrofotografia com câmeras compactas é bastante gratificante e utilizei este tipo de equipamento por vários anos. Mas, quando utilizamos uma câmera Reflex (DSLR), é outra coisa.
A qualidade óptica da câmera, das lentes e os recursos eletrônicos disponíveis fazem muita diferença.
Aqui apresentarei métodos e soluções que uso para fazer Macrofotografia com este tipo de câmera.
Sugiro que leia também os artigos Conceitos Macro e Recursos em Câmeras.
CÂMERAS REFLEX (DSLR)
As câmeras Reflex ou DSLR (Digital Single Lens Reflex) se diferenciam das compactas por possuir um espelho interno que reflete no visor o assunto e, só então ao pressionar o disparador, o espelho move-se e permite que a luz atinja o sensor da câmera.
Mas não é só isto, as câmeras Reflex possuem sensor muito maior que as compactas, o que permite uma qualidade bastante superior.
Sem contar as objetivas intercambiáveis com qualidade óptica melhor que as compactas também.
Antes de comprar minha Reflex pesquisei bastante em sites internacionais especializados, além de reviews com comparações e avaliações de fotógrafos no YouTube.
Trata-se de um equipamento superior e mais complexo que as câmeras compactas portanto, recomendo tutoriais e mini-cursos que você poderá encontrar no YouTube (recomendo: Zona da Fotografia – bem-humorado e direto ao ponto / fotografia em geral).
Para fazer Macrofotografia, você precisa saber operar bem sua câmera em modo manual!.
Se você leu meu artigo Macro com câmeras compactas ou Conceitos Macro, deve ter percebido que eu venho testado fabricantes diferentes há algum tempo... :-). Eu gostei de todas as câmeras que tive.
Não gosto de recomendar marcas, mas se você ainda não tem uma Reflex, fica a dica: a maioria dos sites e vídeos especializados recomendam as marcas Canon ou Nikon.
Fica a dica para você ler também meu artigo sobre Recursos em câmeras. Principalmente o botão de preview da abertura (f). Sem ele, se sua lente for eletrônica, você terá dificuldades para ajustar a abertura manualmente.
Eu particularmente preferi a Canon pela grande variedade de lentes disponíveis para ela.
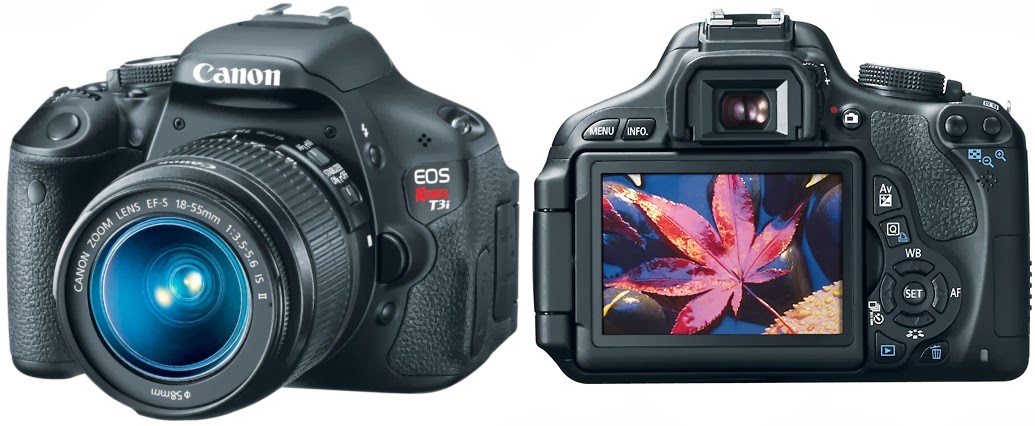
Utilizo hoje uma Canon EOS REBEL T3i 600D que veio com uma lente 18-55mm.
Trata-se de uma câmera DSLR de entrada, mas com todos os recursos e alta qualidade necessários para Macrofotografia:
|
Macrophotography with compact cameras is quite rewarding and I used this type of equipment for several years. But when we use a DSLR, well, it’s something else.
The quality of the câmera, que lens optical quality and the electronic resources available make a lot of difference.
On this article I will present methods and solutions that I use to make macrophotography with this type of camera.
I suggest you also read the articles Macro Concepts and Built-in Features.
CAMERAS DSLR
DSLR (Digital Single Lens Reflex) câmeras has a compact internal mirror that reflects the subject in the viewfinder and when you press the shutter the mirror moves up and allows light to reach the camera sensor.
The DSLR sensor is much larger than the compact cameras’s sensor which provides much higher quality photos.
Not to mention the interchangeable lens with much better optical quality also.
Before buying my DSLR camera I researched a lot on specialized sites, vídeo reviews and professional photographer’s comparisons on YouTube.
It is a superior equipment and more complex than compact cameras therefore I recommend tutorials and mini - courses that you can find easily on YouTube.
To make macrophotography, you need to know how to operate your camera in manual mode !.
If you read my article Macro with compact cameras or Macro Concepts, you should noticed that I've been tested different manufacturers in a while ... :-) . I liked all the cameras I've had.
I do not like to recommend brands, but if you do not have an DSLR here is a hint: most specialized sites and videos reviews recommend Canon or Nikon brands.
Another tip for you is to read my article on Built-In Resources for Macro. Especially the preview button for aperture (f). Without it if your lens is electronic you will have difficulties to adjust the aperture manually.
I personally prefer the Canon for the wide variety of lenses available.
Today I use a Canon EOS REBEL T3i 600D that came with a 18-55mm lens.
It is an entrance DSLR camera but with all the features and quality necessary for Macrophotography:
|
 | |
LENTES:
As câmeras Reflex (DSLR) normalmente vêm com uma “lente de kit” (kit: corpo da câmera + lente).
Veja abaixo a lente que veio com minha câmera:
|
LENSES:
DSLR cameras usually come with a "kit lens" (kit: camera body + lens).
Check below the lens that came with my camera:
|
 | |
Esta lente já é ótima para a Macrofotografia!.
Muito melhor que a lente da câmera compacta + binóculos, inclusive atinge ampliações muito superiores.
Não recomendo comprar lentes Macro específicas, pois além de muito caras, não chegam ao nível de ampliação desta lente do kit!. Com exceção da Canon MPE-65 que é a melhor lente no mundo para Macro, e custa R$ 3.000,00. :-)
No meu caso a lente 18-55mm permite ampliações bastante altas e é possível excursionar a lente dentro deste range (18-55mm) e regular a ampliação desejada, dependendo do tamanho do assunto em questão.
Mas calma, não adianta colocar a lente do kit e sair fotografando no modo florzinha (rs) (macro) pois não vai adiantar!.
TÉCNICA DA LENTE INVERTIDA
Você precisará encaixar a lente de maneira invertida no corpo da câmera. E, para isto, precisará de um anel inversor.
Não tente ficar segurando a lente invertida na frente da câmera, pois, ou você irá riscá-la, ou poderá danificar alguma coisa do corpo. Compre o anel inversor, custa uns R$ 50,00 no Mercado Livre.
O anel inversor possui um lado com rosca e outro com baioneta. Você rosqueia na frente da lente e acopla o lado baioneta no corpo da câmera.
Lembrando que, como a lente está invertida, no meu caso, a posição 18mm apresentará a maior ampliação e a posição 55mm a menor ampliação. Acima de 50mm você não conseguirá boas ampliações. Lentes fixas são ótimas, mas tenha em mente o limite dos 55mm
Veja abaixo o anel e a lente conectada de forma invertida na câmera:
|
This lens is great for Macrophotography!.
Much better than the compact camera lens + binoculars. It even reaches much higher magnifications.
I do not recommend to buy specific Macro lens. It is very expensive and does not reach the level of magnification of the kit lens!. With the exception of Canon MPE-65 which is the world’s best lens for Macro, but its costs US$ 1,000.00. :-)
In my case the 18-55mm lens allows magnification quite high and you can adjust the lens within this range (18-55mm) to get the desired magnification, depending on the size of the subject.
But wait, fitting the lens and setting the camera to little flower mode (macro) won’t work by itself for Macrophotography!.
REVERSED LENS TECHNIQUE
You have to fit the lens reversed on the camera body. And for this, you need a reverse ring.
Do not try to keep holding the reversed lens in front of the camera. You will scratch it or something may damage the body. Buy the reversing ring it costs about US$ 20.00 on eBay.
The reverse ring has a threaded side and a bayonet side. You fit the threaded side in front of the lens and the bayonet to the camera body.
Remember that as the lens are reversed the highest magnification will be, in my case, at 18mm position and the lowest magnification will be at 55mm position. Above 50mm you won't get high magnifications. Fixed lenses are very good also but keep in mind the 50mm limit.
See below the ring and the lens attached reversed on camera:
|
    | |
Como você pode notar, a lente interna fica exposta, assim como os contatos que permitem o controle eletrônico (auto-foco, abertura f, etc) pela câmera.
É aqui que entra a recomendação que fiz anteriormente: saiba como operar sua câmera no modo manual, pois os controles não atuarão na lente.
Cuidado também para não danificar os contatos e/ou a lente exposta.
Sempre funcionou muito bem para mim e nunca tive problemas, mas não me responsabilizo por eventuais danos à sua câmera ou lentes.
Para conseguir uma profundidade de campo adequada para Macro (f de 8 à aproximadamente 22), você precisará ajustar a abertura da sua lente da seguinte forma:
Coloque a lente na posição normal, ajuste o f para a posição desejada, mantenha o botão de preview pressionado, retire a lente e a coloque invertida. Pronto!.
Leia o artigo Recursos em Câmeras para mais detalhes.
Veja abaixo, no meu caso, onde está o botão preview:
|
As you can see, the inner lens is exposed, as well as the contacts that allow the electronic control (auto-focus, aperture f, etc) by the camera.
This is why I recommended you to learn how to operate your camera in manual mode, because the controls will not act on the lens.
Be very careful also not to damage the exposed contacts and / or inner lens.
It always worked very well for me and I never had problems, but I'm not responsible for any damage to your camera or lens.
To achieve an adequate depth of field for macro (f from 8 to about 22), you will need to adjust the aperture of your lens as follows:
Fit the lens to the camera in the normal position, set the desired f value, hold the preview button pressed, remove the lens and put it reversed inverted. Now you’re ready to go!.
Read the Built-in Resources article for details.
See below the preview button in my case:
|
 | |
TUBO EXTENSOR
Uma forma de atingir ampliações ainda maiores é a utilização de um tubo extensor entre o corpo da câmera e a lente.
Este tubo normalmente é composto por 4 anéis roscados intercambiáveis para alterar a distância desejada entre a lente e o corpo da câmera.
Você pode encontrá-lo no Mercado Livre por uns R$ 30,00.
Veja abaixo a câmera montada com o tubo extensor e a lente do kit invertida:
|
EXTENSION TUBE
One way to achieve even higher magnifications is to use an extension tube between the camera body and the lens.
This tube is usually composed of 4 rings threaded and interchangeable to change the desired distance between the lens and camera body.
You can find it on eBay for US$ 20 bucks.
Check below my camera mounted with the extension tube and the reversed kit lens:
|
 | |
FLASH
Para Macrofotografia com câmeras Reflex é imprescindível utilizar flash, seja utilizando o pop-up direcionado, ou um flash externo. Sem este recurso, você não conseguirá bons resultados.
Grandes ampliações e/ou aberturas menores (para obter maior profundidade de campo) exigem muita luz.
Hoje já existem flashes no Mercado Livre muito bons por R$ 250,00.
Sugiro ler meu artigo sobre iluminação para maiores detalhes e possíveis soluções.
No exemplo abaixo você pode ver um setup completo, onde coloco um difusor softbox para iluminar o assunto uniformemente. Às vezes apenas seguro o flash na mão esquerda e posiciono sobre o assunto, sem o suporte.
|
FLASH
For macrophotography with DSLR cameras is essential to use a flash. You can use the pop-up flash directed tu a subject, or an external flash. Without this feature, you will not get good results.
Higher magnifications and / or smaller apertures (for greater depth of field) require a lot of light.
You can find good cheap flashes on eBay for US$ 80.00.
I suggest you to read my article about lighting for details and possible solutions.
In the example below you can see a full setup with a softbox diffuser to evenly illuminate the subject. Sometimes I just hold flash in my left hand and position it over the subject.
|
    | |
COMPARATIVO ENTRE AMPLIAÇÕES
Para finalizar este artigo, apresento abaixo uma sequência de fotos onde é possível ter uma ideia da ampliação de câmeras Reflex em diversas configurações:
|
MAGNIFICATIONS COMPARISON
To finish this article I present below a sequence of photos where you can get an idea of magnifications using DSLR cameras in many configurations:
|
        | |
0 comentários:
Postar um comentário